
Have you ever looked around your home and felt like something was missing, but hiring an interior designer seemed too expensive? You’re not alone. Many people want a stylish, welcoming home without spending thousands of dollars on professional decorating services.
The good news is that DIY Home Decor That Looks Like You Hired a Designer is completely possible. With a few smart design tricks, affordable materials, and creative ideas, you can transform any room into a space that feels polished and professionally styled.
In this guide, you’ll learn how designers create beautiful interiors, which DIY projects make the biggest impact, common decorating mistakes to avoid, and practical tips that instantly elevate your home. Whether you’re decorating a small apartment, updating a family home, or refreshing a single room, these ideas will help you achieve a high-end look on a realistic budget.
If you’re planning a full makeover, you may also find inspiration in our Interior Design and Home Decor resources.
Why DIY Home Decor Can Look Expensive
DIY home decor looks professionally designed when it follows key design principles like balanced color palettes, layered lighting, quality finishes, proper furniture placement, and thoughtful accessories. Small improvements often create a bigger visual impact than expensive furniture alone.
Many people believe expensive homes look beautiful simply because they contain costly furniture. In reality, professional designers focus much more on composition, proportion, texture, lighting, and consistency than on price tags.
That means a modest budget can still produce impressive results when every decorative element works together.
Professional-looking DIY decorating typically focuses on:
- Consistent color schemes
- Balanced furniture layouts
- Layered lighting
- Decorative textures
- Statement artwork
- Clean organization
- Personalized accessories
- Quality-looking finishes
Instead of buying everything new, successful DIY decorators improve what they already own while investing selectively in pieces that create the greatest visual impact.
💡 Pro Tip: Designers often recommend spending money on fewer, larger statement pieces rather than filling a room with many small decorative items.
What Makes a Home Look Professionally Designed?
A professionally designed home feels balanced, cohesive, functional, and visually interesting. Every piece serves a purpose, colors complement one another, and accessories enhance rather than overwhelm the space.
Several design principles separate an average room from one that feels magazine-worthy.
Cohesive Color Palette
Professional interiors rarely contain random colors.
Instead, designers usually choose:
- One dominant color
- One secondary color
- One accent color
This simple formula creates harmony throughout the room.
For example:
| Design Element | Color Choice |
|---|---|
| Walls | Warm White |
| Sofa | Soft Gray |
| Accent Pillows | Olive Green |
| Curtains | Natural Linen |
| Decor | Black + Wood Accents |
Repeating these colors throughout the room creates a polished appearance.
Layered Lighting
Lighting dramatically changes how expensive a room feels.
Instead of relying only on ceiling lights, combine multiple light sources.
Good layering includes:
- Ceiling fixtures
- Table lamps
- Floor lamps
- Wall sconces
- LED accent lighting
- Candles for ambiance
Each layer adds warmth and depth while eliminating harsh shadows.
⭐ Expert Tip: Use warm white bulbs (2700K–3000K) in living rooms and bedrooms to create a cozy atmosphere similar to professionally designed homes.
Texture Creates Luxury
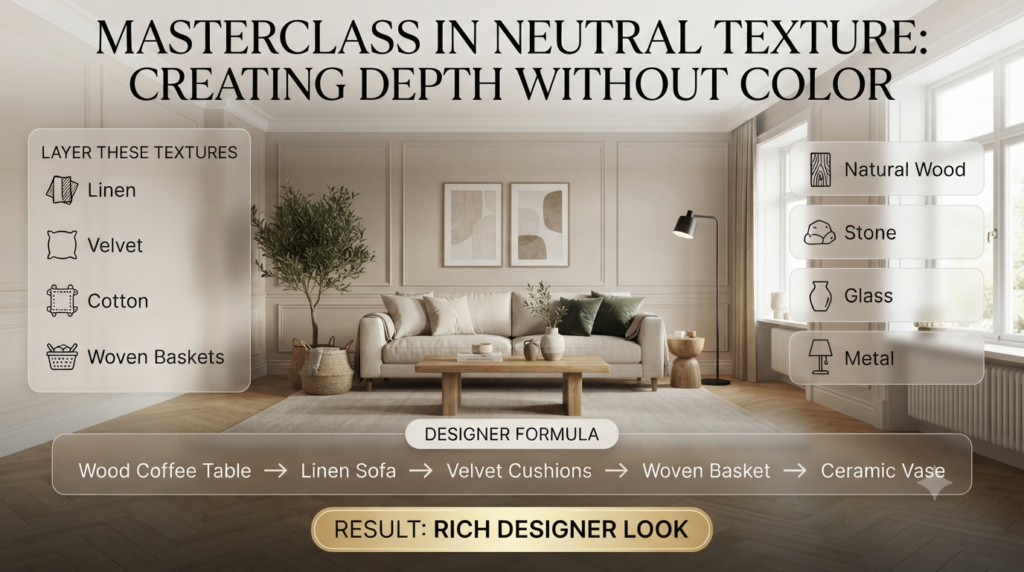
Luxury interiors rarely depend on bright colors.
Instead, they rely on texture.
Combine materials like:
- Linen
- Velvet
- Cotton
- Woven baskets
- Natural wood
- Stone
- Glass
- Metal
Mixing these textures prevents rooms from feeling flat.
Example:
Wood Coffee Table
        +
Linen Sofa
        +
Velvet Cushions
        +
Woven Basket
        +
Ceramic Vase
The result feels rich even when every item is affordable.
Scale Matters More Than Price
One oversized artwork usually looks more luxurious than several tiny frames scattered across a wall.
Similarly:
Large mirrors
Oversized plants
Tall curtains
Large rugs
Wide coffee tables
often create a custom-designed appearance.
DIY Home Decor Ideas That Instantly Elevate Any Room
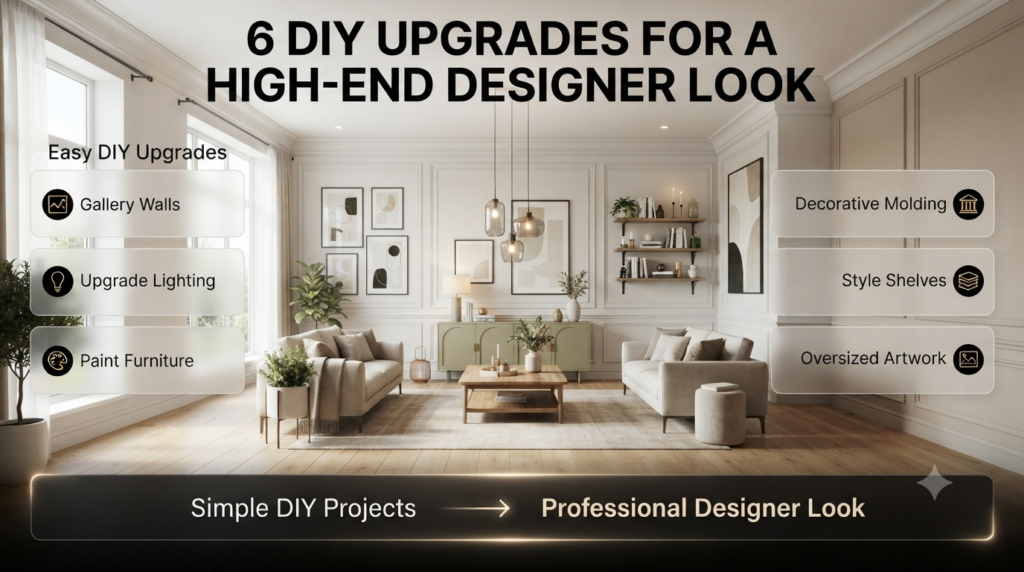
The easiest DIY projects that make a home look professionally designed include creating gallery walls, upgrading lighting, painting furniture, adding decorative molding, styling shelves, and using oversized artwork.
Let’s explore the projects that deliver the biggest transformation.
1. Create a Designer Gallery Wall
Gallery walls remain one of the most effective ways to personalize a room while adding visual interest.
Instead of randomly hanging pictures, designers carefully plan spacing, frame colors, and artwork sizes.
Step 1: Choose a Theme
Examples include:
- Family photography
- Botanical prints
- Black-and-white architecture
- Travel memories
- Minimal abstract art
- Vintage illustrations
Keeping one theme creates visual consistency.
Step 2: Match Your Frames
Using identical or coordinated frames instantly upgrades the display.
Popular options include:
- Matte black
- Natural oak
- White wood
- Gold metal
Avoid mixing too many frame styles unless you’re intentionally creating an eclectic look.
Step 3: Plan Before Hanging
Lay every frame on the floor first.
Experiment with spacing until the arrangement feels balanced.
Leave approximately:
- 2–3 inches between small frames
- 3–5 inches between larger frames
This prevents clutter.
📌 Quick Tip: Cut paper templates the same size as your frames and tape them to the wall before making nail holes.
2. Paint Old Furniture for a Custom Look
Furniture paint remains one of the highest-return DIY upgrades.
An outdated cabinet can become a modern statement piece with nothing more than paint and new hardware.
Popular paint colors include:
- Matte Black
- Sage Green
- Warm White
- Navy Blue
- Charcoal Gray
- Deep Forest Green
Replacing knobs with brass, matte black, or brushed nickel hardware makes an even bigger difference.
Best Furniture to Paint
- Dressers
- Nightstands
- Bookshelves
- Side tables
- TV stands
- Dining chairs
- Entry cabinets
⚠ Common Mistake: Skipping primer often leads to peeling paint, especially on laminate furniture. Proper preparation ensures a smoother, longer-lasting finish.
3. Install Picture Frame Wall Molding
Decorative molding gives ordinary walls a custom-built appearance.
The good news?
Modern lightweight molding is inexpensive and beginner-friendly.
Basic process:
- Measure the wall.
- Mark panel locations.
- Cut molding pieces.
- Attach with construction adhesive.
- Fill nail holes.
- Caulk seams.
- Paint everything the same wall color.
The finished result resembles expensive custom millwork found in luxury homes.
This project works especially well in:
- Dining rooms
- Entryways
- Living rooms
- Hallways
- Home offices
If you’re updating multiple spaces, browse more ideas in our Room Design section.
4. Upgrade Cabinet Hardware
Replacing hardware is one of the fastest weekend projects.
Old handles instantly date kitchens and bathrooms.
Popular designer finishes include:
- Matte Black
- Brushed Brass
- Satin Nickel
- Antique Bronze
This inexpensive upgrade often makes cabinets feel brand new without replacing them.
5. Style Open Shelves Like a Designer
Professionally styled shelves never feel overcrowded.
Instead, they balance decorative and functional pieces.
A simple styling formula is:
- Books
- Small plants
- Ceramic vases
- Candles
- Framed photos
- Decorative bowls
- Sculptural objects
Arrange items in groups of three and vary their heights for a balanced look.
6. Use Large Mirrors to Make Rooms Feel Bigger
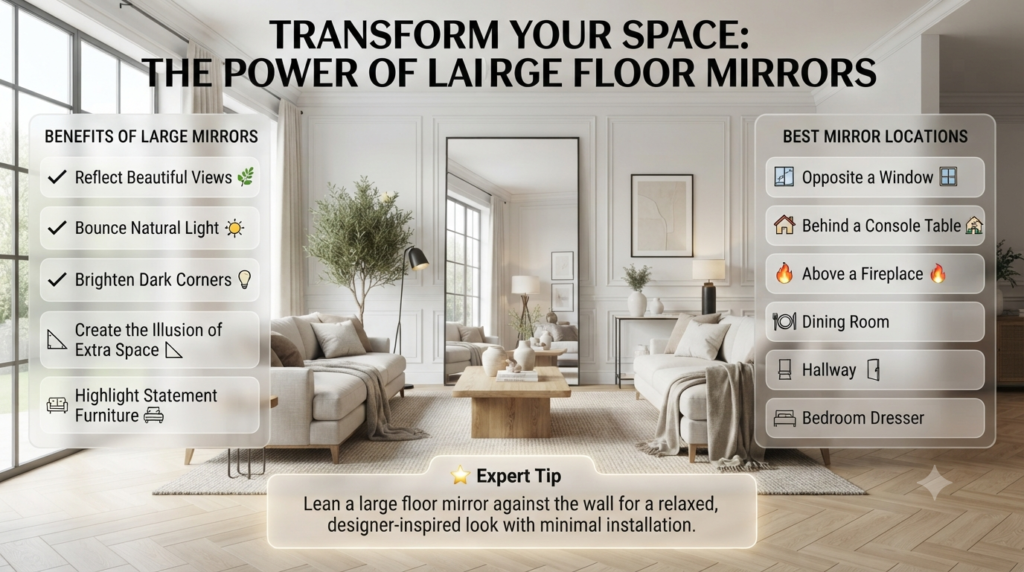
Large mirrors reflect both natural and artificial light, making rooms appear brighter, more spacious, and more expensive. Proper placement can visually double the size of a small room while adding elegance.
Professional designers almost always use mirrors strategically instead of simply treating them as functional pieces.
A well-placed mirror can:
- Reflect beautiful views
- Bounce daylight around the room
- Brighten dark corners
- Create the illusion of extra space
- Highlight artwork or statement furniture
Best Places to Hang a Mirror
| Location | Benefit |
|---|---|
| Opposite a window | Reflects natural light |
| Behind a console table | Creates an elegant entryway |
| Above a fireplace | Adds height and balance |
| Dining room | Makes the room feel larger |
| Hallway | Brightens narrow spaces |
| Bedroom dresser | Functional and decorative |
Avoid placing mirrors where they’ll reflect clutter, laundry, or busy storage areas. They amplify everything they face—including mess.
⭐ Expert Tip: Leaning a large floor mirror against the wall creates a relaxed, designer-inspired look without the need for complicated installation.
7. Layer Rugs for a Custom Designer Finish
Layering rugs adds warmth, texture, and depth while making furniture arrangements feel intentional. It’s an affordable way to create a luxurious, custom-designed appearance.
Many luxury homes combine two rugs instead of relying on one expensive oversized option.
Popular combinations include:
- Jute rug + patterned area rug
- Neutral rug + faux sheepskin
- Large sisal rug + colorful vintage rug
- Flat-weave rug + plush accent rug
This technique works especially well in:
- Living rooms
- Bedrooms
- Reading corners
- Home offices
Rug Size Guide
| Room | Recommended Rug Size |
|---|---|
| Small Living Room | 5′ × 8′ |
| Medium Living Room | 8′ × 10′ |
| Large Living Room | 9′ × 12′ |
| Queen Bedroom | 8′ × 10′ |
| King Bedroom | 9′ × 12′ |
| Dining Room | Large enough for chairs to remain on the rug |
📌 Quick Tip: A rug that’s too small is one of the quickest ways to make a room look unfinished.
8. Upgrade Walls with DIY Artwork
Oversized artwork creates an expensive focal point. You don’t need to buy original paintings—many high-end looks can be achieved with DIY abstract art, printable designs, textured canvas projects, or framed fabric.
Large wall art immediately draws attention and anchors the room.
Easy DIY artwork ideas include:
- Abstract acrylic paintings
- Neutral textured canvas art
- Framed wallpaper samples
- Botanical prints
- Black-and-white photography
- Vintage maps
- Pressed botanical displays
- Handmade fabric art
Simple Abstract Canvas Project
Step 1: Purchase a blank canvas.
Step 2: Choose three complementary paint colors.
Step 3: Use wide brush strokes, palette knives, or sponges.
Step 4: Let layers dry naturally.
Step 5: Hang the artwork in a simple frame.
The goal isn’t perfection. Many designer pieces embrace subtle imperfections and organic movement.
If you enjoy creative projects, explore more inspiration in DIY Crafts.
9. Bring Nature Indoors
Plants soften interiors, improve visual balance, and make rooms feel fresh and inviting. Even one large indoor plant can dramatically enhance a space.
Interior designers rarely complete a room without greenery.
Popular low-maintenance indoor plants include:
- Snake Plant
- ZZ Plant
- Pothos
- Rubber Plant
- Peace Lily
- Monstera
- Fiddle Leaf Fig
- Spider Plant
Designer Styling Tips
Instead of placing several tiny plants throughout the room:
- Choose one statement floor plant.
- Use decorative ceramic or woven planters.
- Group smaller plants in odd numbers.
- Vary plant heights.
- Mix leaf shapes for visual interest.
💡 Pro Tip: Faux plants have improved significantly. High-quality artificial greenery can work well in rooms with limited natural light.
10. Upgrade Soft Furnishings
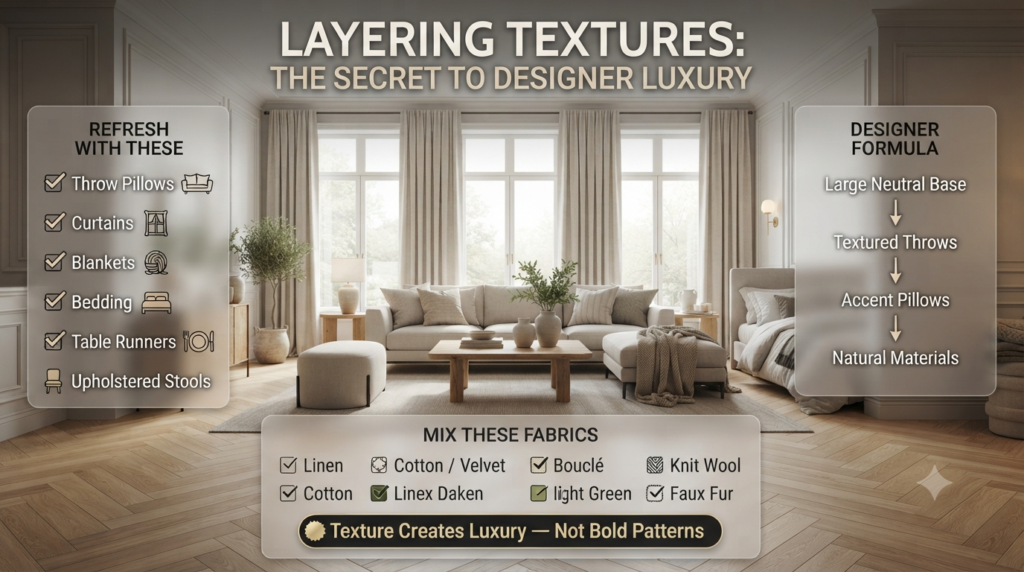
Changing textiles is one of the fastest ways to refresh a room without renovating.
Focus on:
- Throw pillows
- Curtains
- Blankets
- Bedding
- Table runners
- Upholstered stools
Designer Formula
Large Neutral Base
          ↓
Textured Throws
          ↓
Accent Pillows
          ↓
Natural Materials
Mix different fabrics such as:
- Linen
- Cotton
- Velvet
- Bouclé
- Knit wool
- Faux fur
Rather than using many bold patterns, let texture provide visual interest.
Step-by-Step: How to Decorate a Room Like a Professional
Step 1: Remove Everything You Don’t Need
Professional decorating starts by simplifying the space.
Ask yourself:
- Do I actually use this?
- Does it fit the room’s style?
- Does it create visual clutter?
- Can it be stored elsewhere?
A cleaner room always feels more expensive.
Step 2: Choose One Focal Point
Every professionally designed room has something that naturally draws attention.
Examples include:
- Fireplace
- Large artwork
- Statement sofa
- Accent wall
- Oversized mirror
- Beautiful window
- Built-in shelving
Arrange furniture to support—not compete with—that focal point.
Step 3: Create Visual Balance
Balance doesn’t require perfect symmetry.
Instead, distribute visual weight evenly.
Example:
| Left Side | Right Side |
|---|---|
| Floor Lamp | Tall Plant |
| Sofa | Accent Chair |
| Large Artwork | Bookshelf |
| Side Table | Storage Basket |
This creates harmony without making the room feel overly formal.
Step 4: Add Personality
Beautiful homes reflect the people who live in them.
Include meaningful items such as:
- Travel souvenirs
- Handmade pottery
- Family photographs
- Favorite books
- Vintage finds
- Personal collections
- Framed memories
The goal is a curated look rather than a showroom display.
Common DIY Home Decor Mistakes to Avoid
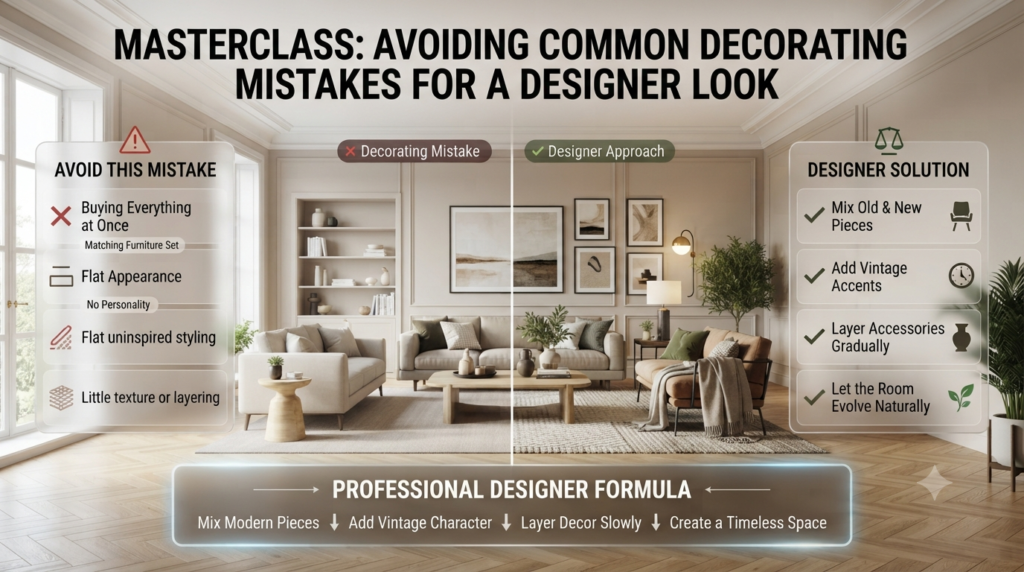
Even great decorating ideas can fall flat if a few common mistakes aren’t addressed.
Buying Everything at Once
A professionally designed home evolves over time.
Buying an entire furniture set often results in a space that feels flat and lacks personality.
Instead:
- Mix old and new pieces.
- Add vintage accents.
- Layer accessories gradually.
- Let the room develop naturally.
Choosing Paint Before Furniture
Paint is one of the easiest things to change.
Furniture, rugs, and artwork are much harder to replace.
Professional designers usually select large furniture pieces first, then match paint colors afterward.
Ignoring Scale
Tiny accessories in a large room look lost.
Oversized furniture in a compact room feels overwhelming.
Always measure:
- Furniture
- Rugs
- Wall art
- Lighting fixtures
- Curtains
before purchasing.
⚠ Common Mistake: Buying furniture without measuring doorways and room dimensions can lead to expensive returns and awkward layouts.
Overdecorating Every Surface
Not every shelf, table, or wall needs decoration.
Negative space allows beautiful pieces to stand out.
A room with breathing room feels calmer and more sophisticated than one filled with accessories.
Using Too Many Colors
Limit your palette to maintain consistency.
A simple guideline is:
- 60% dominant color
- 30% secondary color
- 10% accent color
This creates a balanced and timeless look.
Budget-Friendly DIY Decor Projects Under $100
| Project | Estimated Budget | Difficulty | Impact |
|---|---|---|---|
| Paint an Accent Wall | $30–$60 | Easy | High |
| Gallery Wall | $40–$90 | Easy | High |
| Replace Cabinet Hardware | $20–$80 | Easy | Medium |
| DIY Floating Shelves | $40–$100 | Medium | High |
| Large Mirror Makeover | $30–$80 | Easy | High |
| Paint Furniture | $40–$90 | Medium | High |
| Decorative Wall Molding | $70–$100 | Medium | Very High |
| Indoor Plant Corner | $40–$90 | Easy | High |
These projects prove that impressive transformations don’t always require a large renovation budget.
For more affordable upgrades throughout your home, visit Home Improvement Tips and browse additional Furniture ideas.
Designer Secrets Professionals Use Every Time
Professionals rely on proven principles that anyone can apply.
Repeat Materials
Use the same wood tone, metal finish, or fabric in multiple places to create cohesion.
Vary Heights
Arrange décor at different heights to add movement and avoid a flat appearance.
Mix Shapes
Combine curved objects with straight lines for visual contrast.
Style in Odd Numbers
Groups of three or five generally look more natural than even-numbered arrangements.
Hide Everyday Clutter
Use baskets, decorative boxes, cabinets, and trays to keep surfaces tidy while maintaining easy access to frequently used items.
⭐ Expert Tip: Before buying new décor, rearrange what you already own. Simply moving artwork, lamps, or accessories between rooms often creates a surprisingly fresh look at no cost.
How can I make my DIY home decor projects look professional instead of cheap?
The difference between a “craft project” and a “designer piece” always comes down to scale, material choices, and finishing details. Cheap DIYs often fail because creators use raw hot glue, visible plastic, or unpainted edges. To achieve a high-end designer look, you must use substantial materials like heavy wood, stone, or thick metals, and invest time in the sanding, priming, and painting stages. Designers focus heavily on seamless execution, meaning screw heads are hidden, joints are tight, and paint finishes are smooth and uniform.
Upscale your scale: Choose larger, oversized decor pieces rather than clustering multiple small, cluttered items together.
Hide the mechanics: Conceal all glue lines, staples, brackets, and screw heads using wood filler or matching paint.
Invest in finishing: Always sand surfaces between coats of high-quality paint or stain to eliminate brush strokes and bumps.
Mix textures intentionally: Combine contrasting textures like matte ceramics with polished metallic accents to create visual depth.
What are the highest-ROI DIY projects to make a living room look expensive?
The highest-ROI (Return on Investment) projects focus on architectural upgrades and large-scale visual anchors. Designers use millwork to give a room permanent character, historical weight, and structure. Adding custom wall molding or upgrading your builder-grade fireplace surround completely transforms the foundation of the room. Because these features are physically attached to the house, they instantly elevate the perceived real estate value and make everything else in the room look highly curated. Install applied wall molding: Use picture frame molding or vertical board and batten to add instant architectural interest to plain drywall.
Swap out standard hardware: Replace basic cabinet knobs and drawer pulls with heavy, solid brass or matte black hardware.
Build faux built-in bookshelves: Anchor standard retail bookcases to the wall and wrap them in matching crown molding and baseboards.
Frame cheap mirrors: Build a custom stained or painted wood frame around basic bathroom or wall mirrors to give them weight.
How do interior designers style thrifted or budget items to look high-end?
Designers look at thrift store items for their shape and silhouette, completely ignoring the original color, finish, or outdated pattern. The secret to making a budget item look like a luxury antique is the art of refinishing and intentional placement. By applying a cohesive, sophisticated color palette—such as matte black, textured concrete, or warm plaster finishes—you mask the cheap origins of the item. Grouping these pieces according to strict design principles prevents them from looking like random second-hand clutter.
The power of matte paint: Spray paint cheap glass or ceramic vases with textured matte paint to mimic expensive stoneware.
Follow the rule of threes: Style thrifted items in asymmetrical groups of three, varying the heights and shapes for a balanced look.
Incorporate negative space: Leave breathing room around your styled decor items so each piece feels intentional and premium.
Elevate with pedestals: Place smaller thrifted objects on top of stacked, hardback art books to give them height and importance.
What DIY lighting upgrades give a space a custom-designed feel?
Lighting is the ultimate mood setter in luxury design, yet it is often the most neglected element in budget homes. Designers rarely rely on a single overhead light; instead, they focus on creating accent points that highlight art and architectural features. You do not need to hire an electrician to achieve this. By utilizing battery-powered or rechargeable LED technology, you can mount high-end light fixtures anywhere on your walls, instantly introducing the warmth, layers, and dramatic ambiance found in luxury boutique hotels. Wireless picture lights: Mount a battery-operated LED art light above your favorite canvas prints to create a gallery aesthetic.
The puck light trick: Install hardwired-style wall sconces without wiring them, using remote-controlled rechargeable puck lights inside instead.
Under-cabinet LED strips: Hide warm LED light strips under kitchen cabinets or floating shelves to create an expensive glow.
Upgrade your lampshades: Replace cheap plastic or paper lampshades with textured linen or pleated fabric shades to soften the light emissions.
How can I create large-scale DIY wall art that looks like a gallery piece?
Small, scattered picture frames shrink a room and look disorganized. Luxury spaces utilize massive, oversized art pieces to create a singular, powerful focal point. Creating your own large-scale art is highly cost-effective if you focus on abstract minimalism, texture, and professional framing. You do not need elite drawing skills; instead, you rely on physical depth—such as plaster waves or heavy fabric drapes—to catch shadows and look sophisticated. The frame itself does 50% of the work in making the art look incredibly valuable.
DIY textured plaster art: Apply joint compound onto a massive canvas using a drywall trowel or notch comb to create minimalist ridges.
Shower curtain canvas hack: Stretch a high-end, heavy-patterned fabric or graphic shower curtain over a large homemade wooden frame.
Use oversized matting: Place smaller prints inside giant frames with massive white mat boards to replicate a museum look.
Frame architectural remnants: Mount a beautiful piece of vintage textile, patterned wallpaper, or carved wood inside a sleek shadowbox.
Conclusion
Creating DIY Home Decor That Looks Like You Hired a Designer isn’t about spending the most money—it’s about making thoughtful design choices that work together. By focusing on color, lighting, texture, scale, and organization, you can transform ordinary rooms into spaces that feel elegant, comfortable, and uniquely yours.
Start with one project rather than trying to renovate your entire home at once. Paint an old piece of furniture, install new cabinet hardware, hang oversized artwork, or introduce a few well-chosen plants. As each improvement builds on the last, your home will gradually develop the polished, cohesive look that professional designers strive for.
The most beautiful homes aren’t created overnight. They’re shaped by careful planning, practical upgrades, and personal touches that reflect the people who live there. With the ideas in this guide, you’re well equipped to create a stylish home that looks custom-designed—without paying designer prices.